Protecting Dog Paws in Winter: Complete Guide to Salt & Snow Safety
There's nothing quite like the look of betrayal on a dog's face when their afternoon walk suddenly turns painful. One minute they're happily trotting along, and the next – a sudden stop, a lifted paw, and those eyes that seem to say, "What kind of horrible surface have you led me onto?"
Winter brings unique challenges for our four-legged family members, particularly when it comes to their sensitive paw pads. The same salt and chemicals that keep our roads and sidewalks safe for humans can cause serious discomfort and even injuries to our dogs.
As professional dog trainers, we've seen countless cases of winter paw problems that could have been prevented with the right knowledge and preparation. In this comprehensive guide, we'll cover everything you need to know about protecting your dog's paws during the harsh winter months – from understanding the dangers to training your dog to wear protective boots, creating DIY paw balms, and establishing safe winter walking routines.
Understanding Winter Paw Dangers
How Salt and De-icers Damage Dog Paws
Commercial ice melters typically contain chemicals like sodium chloride (rock salt), calcium chloride, potassium chloride, magnesium chloride, and sometimes even urea. These substances work by lowering the freezing point of water, but they also:
Draw moisture out of your dog's paw pads, causing dryness and cracking
Create a burning sensation on contact with skin
Cause chemical irritation that can lead to inflammation
Produce heat through chemical reactions (especially calcium chloride)
Lead to gastrointestinal issues if your dog licks their paws afterward
The crystalline structure of salt can also create physical abrasions on paw pads, similar to walking on tiny shards of glass. These micro-cuts then allow the chemicals to penetrate deeper into the tissue, compounding the irritation.
Signs Your Dog's Paws Are Being Affected
Watch for these warning signs that your dog's paws are experiencing winter damage:
Limping or sudden refusal to walk
Excessive licking or chewing at the paws
Visible redness or irritation between paw pads
Cracked, dry, or bleeding paw pads
Holding up one or more paws while walking
Visible salt crystals or ice balls stuck between toes
Whimpering or showing signs of pain when walking
Common Winter Paw Injuries and Their Prevention
Salt Burns: Chemical burns from road salt appear as red, irritated areas on paw pads and between toes. These burns can range from mild irritation to deep tissue damage in severe cases.
Prevention: Use protective boots, apply paw wax before walks, and thoroughly rinse paws after exposure.
Frostbite: Extended exposure to freezing temperatures can cause frostbite, particularly on the tips of toes and the edges of paw pads.
Prevention: Limit outdoor time in extreme cold, use insulated boots, and check paws frequently during winter activities.
Snowball Accumulation: Snow can compact between toe pads, forming painful ice balls that pull on the skin and hair.
Prevention: Trim the hair between paw pads before winter, use boots, or apply paw wax to prevent snow adherence.
Cracked Pads: The cycle of wet and dry conditions combined with cold temperatures can cause paw pads to crack and split.
Prevention: Regular moisturizing with dog-safe balms and preventing exposure to salt and chemicals.
The Complete Winter Paw Protection System
Pre-Walk Prevention Strategies
Preparing your dog's paws before venturing out into winter conditions is your first line of defense:
Trim Paw Hair: Keep the hair between paw pads trimmed short to minimize snow and ice accumulation. Use rounded scissors and be careful not to cut too close to the skin.
Apply Paw Protection: Before heading out, apply a protective barrier like paw wax or balm to create a shield between sensitive paw pads and harsh elements.
Condition Gradually: If it's your dog's first winter, gradually increase outdoor exposure time to help toughen up paw pads naturally.
Check Weather Conditions: Be aware of temperature, precipitation, and road treatment schedules in your area to choose the safest walking times.
Prepare Equipment: Have boots ready and properly fitted before the first snowfall, allowing time for training before they're actually needed.
During-Walk Monitoring and Protection
Stay vigilant while out on winter walks to catch problems early:
Observe Behavior Changes: Pay attention to any sudden changes in your dog's gait, reluctance to walk, or attention to their paws.
Regular Paw Checks: For longer walks, stop periodically to check between toes for snow buildup or signs of irritation.
Carry Supplies: Bring a small towel to wipe paws if you notice salt contact, and carry an extra set of boots if the first pair gets wet or lost.
Recognize Temperature Limits: Know your dog's cold tolerance based on their breed, size, age, and health status, and head home before they reach their limit.
Avoid Obvious Salt Areas: When possible, walk your dog on snow-covered grass rather than heavily treated sidewalks and roads.
Post-Walk Paw Care Routine
What you do after a winter walk is just as important as preparation:
Immediate Paw Rinse: Rinse your dog's paws with lukewarm (not hot) water to remove salt, chemicals, and ice. A small basin by the door works perfectly.
Thorough Drying: Carefully dry between toes and paw pads with a soft towel to prevent moisture-related issues.
Inspect for Injuries: Check for any cuts, cracks, or irritation that might have occurred during the walk.
Apply Healing Balm: For dry or slightly irritated paws, apply a healing paw balm or coconut oil to soothe and moisturize.
Monitor After Care: Watch your dog for continued licking or discomfort, which might indicate you missed an injury during cleaning.
Training Your Dog to Accept Protective Boots
Choosing the Right Boots for Your Dog
Not all dog boots are created equal. Consider these factors when selecting the best option:
Proper Sizing: Measure your dog's paws when standing (weight spreads the paw) for the most accurate size.
Material: Look for waterproof, durable outer material with inner fleece or soft lining for comfort.
Closure System: Velcro straps tend to be easier to adjust than zip-up styles.
Sole Type: Rubber soles with tread provide better traction on icy surfaces.
Flexibility: Boots should bend with your dog's paw movement while walking.
Height: Higher boots provide more protection but may be less comfortable for some dogs.
Step-by-Step Boot Training Process
Most dogs don't naturally accept boots, but with patience and positive association, you can train your dog to wear them comfortably:
Step 1: Introduction and Positive Association
Begin by simply showing your dog the boots and providing treats.
Let them sniff and investigate the boots while you praise and reward.
Place treats on top of the boots so your dog associates good things with them.
Practice this for several days until your dog shows positive excitement seeing the boots.
Step 2: Touching Paws with Boots
Gently touch one of your dog's paws with a boot, then immediately reward.
Gradually increase the duration of contact before giving the reward.
Practice with all four paws, spending extra time with any paw your dog seems more sensitive about.
Step 3: Momentary Placement
Briefly slip a boot onto just one paw, reward immediately, then remove it.
Start with just a second or two and gradually increase duration.
Only move to the next paw when your dog is comfortable with the current one.
Step 4: Wearing One Boot
Put one boot on properly and secure it comfortably—not too tight, not too loose.
Let your dog walk around with just one boot for a minute or two.
Reward calm behavior and acceptance of the boot.
Step 5: Building Up to All Four Boots
Once comfortable with one boot, add a second boot on the opposite side (e.g., front left and back right).
Practice walking with two boots before adding the third and fourth.
Keep sessions positive and brief, ending on a successful note.
Step 6: Indoor Practice Sessions
Have your dog wear all four boots inside the house for short periods.
Engage in fun activities like fetch or tug-of-war to distract from the boots.
Gradually increase wearing time over several days.
Step 7: Outdoor Transition
Take your dog outside with boots for very short, positive experiences.
Choose a quiet area without distractions for initial outdoor boot-wearing.
Gradually work up to normal walking routes and duration.
Troubleshooting Common Boot Problems
Problem: Dog Freezes and Won't Walk
Solution: This "statue response" is common. Gently encourage movement by luring with treats in front of the nose, or try backing away and calling your dog to you. Never drag or force movement.
Problem: Dog Kicks Boots Off
Solution: Ensure proper sizing and secure fastening. Some dogs need boots with additional ankle straps for security.
Problem: Boots Rotate While Walking
Solution: The boots are likely too large. Try a smaller size or a different brand with a more secure fit.
Problem: Excessive Licking at Boots
Solution: Check for rubbing or discomfort, and ensure the boot isn't too tight. Some dogs need their fur trimmed around the area where the boot secures.
Problem: Dog Seems Uncomfortable or Walks Strangely
Solution: This is normal at first! Most dogs walk with an exaggerated gait until they adjust to the sensation. Short, positive practice sessions will help them adapt.
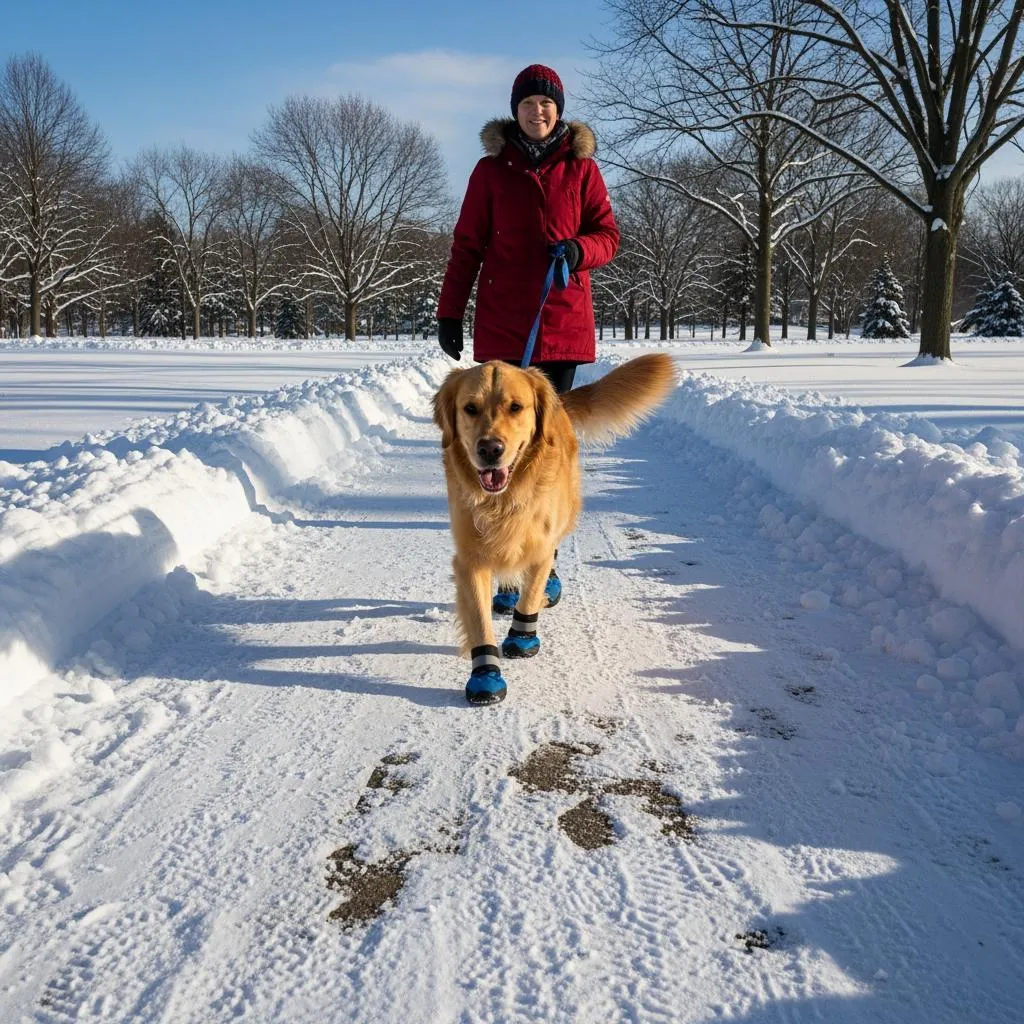
Client Success Story: Max Learns to Love His Boots
When Jennifer brought her Golden Retriever Max to us, she was frustrated by his absolute refusal to wear boots despite his obvious paw pain from salt. "He'd rather limp than wear them," she told us. We started Max on our gradual desensitization program, discovering that his main issue was the sound of the velcro, which startled him. By using high-value treats and pairing the velcro sound with positive experiences, we helped Max overcome his fear. Within two weeks, he was comfortably wearing boots for his entire walk. Jennifer recently shared that Max now gets excited when he sees his boots come out, knowing they mean he gets to go for a comfortable winter adventure.
DIY Paw Protection Alternatives
Homemade Paw Balm Recipes
If your dog won't tolerate boots or you need additional protection, these DIY paw balms can help:
Basic Protective Paw Balm
Ingredients:
2 tablespoons coconut oil
2 tablespoons shea butter
1 tablespoon beeswax pellets
1 teaspoon olive or vitamin E oil
Instructions:
Melt the beeswax, coconut oil, and shea butter in a double boiler.
Remove from heat and add the olive or vitamin E oil.
Pour into small containers and allow to cool completely.
Apply to paw pads before walks for protection.
Healing Paw Balm (for already irritated paws)
Ingredients:
2 tablespoons coconut oil
2 tablespoons shea butter
1 tablespoon beeswax pellets
1 teaspoon vitamin E oil
5 drops lavender essential oil (optional, for mild antiseptic properties)
3 drops calendula oil
Instructions:
Follow the same melting process as the basic balm.
Add the essential oils after removing from heat.
Allow to cool completely before use.
Apply to clean, dry paws after walks or at bedtime.
Extra-Firm Winter Protection Balm
Ingredients:
2 tablespoons coconut oil
1 tablespoon shea butter
2 tablespoons beeswax pellets
1 teaspoon olive oil
Instructions:
Follow the standard melting process.
The higher beeswax content creates a firmer barrier against salt and snow.
This formula stays on longer but may require more frequent application.
Paw Wax Application Techniques
For maximum effectiveness, apply paw protection properly:
Clean First: Always start with clean, dry paws.
Warm the Product: Rub the balm between your fingers to warm it slightly for easier application.
Apply Thoroughly: Gently spread the balm on all paw pads, working it between toes and covering the entire walking surface.
Create a Thin Layer: You want enough to create a barrier without being so thick that it causes slipping or discomfort.
Allow Absorption Time: Apply 5-10 minutes before walking to allow some absorption while maintaining protective qualities.
Distract After Application: Offer a treat or toy immediately after application to prevent immediate licking off of the product.
When to Use Balms vs. Boots
Both protection methods have their place in winter paw care:
Choose Balms When:
Your dog absolutely refuses boots despite training
Temperatures are mild (above 25°F)
Walks will be short (under 15 minutes)
There's minimal salt on your walking route
You need quick protection without preparation time
Choose Boots When:
Temperatures are very cold (below 25°F)
Heavy salt or chemical treatments are present
Your dog has existing paw injuries that need protection
Walks will be longer than 30 minutes
You're walking in deep snow where snowballs can form between toes
Consider Using Both When:
Extremely harsh conditions exist
Your dog has particularly sensitive paws
Previous paw injuries make extra protection necessary
You're planning extended outdoor activities
Creating Safe Winter Walking Routines
Planning Safer Walking Routes
Not all winter walking routes are created equal when it comes to paw safety:
Scout Ahead: If possible, check potential routes before bringing your dog to identify heavily salted areas.
Seek Natural Surfaces: Snow-covered grass in parks or fields typically contains less salt and chemicals than sidewalks.
Consider Less-Traveled Paths: Secondary sidewalks and residential streets often have less aggressive salt application than main thoroughfares.
Avoid Industrial Areas: Commercial properties and industrial zones typically use stronger de-icing chemicals than residential areas.
Create a Mental Map: Note which neighbors use pet-safe ice melters and which use traditional salt to plan your route accordingly.
Time of Day Considerations
When you walk can be as important as where you walk:
Mid-Day Advantage: Walking between 10am-2pm takes advantage of the warmest part of the day when some ice may have melted.
Fresh Snowfall Opportunity: Walking shortly after fresh snow, before salt trucks arrive, can provide a clean surface for your dog.
Avoid Post-Treatment Times: Try to learn when your local roads and sidewalks are typically treated, and avoid walking immediately afterward.
Morning Salt Concentration: Be aware that overnight ice treatments may be at their highest concentration in early morning.
Post-Rain Caution: After winter rain, dissolved salt can actually be more easily absorbed into paw pads than crystalline salt.
Adjusting Walk Duration and Frequency
Winter often requires rethinking your walking schedule:
Multiple Short Walks: Replace one long walk with several shorter ones to limit exposure to cold and salt.
Temperature-Based Duration: Adjust walk length based on temperature—the colder it is, the shorter the walk.
Watch for Signals: Learn to recognize when your dog is becoming uncomfortable and be willing to cut walks short.
Gradual Conditioning: Slowly increase winter walk duration as the season progresses to build your dog's cold tolerance.
Rest Day Planning: After a day with challenging conditions, consider an indoor exercise day to allow paws to recover.
Client Success Story: Bailey's Winter Walking Transformation
Bailey, a sensitive Border Collie mix, would dramatically refuse to walk past certain houses in winter due to their heavy salt use. His owner, Michael, was frustrated by the unpredictable walks and Bailey's increasing reluctance to go out at all. We helped Michael map out a "salt-minimal route" in his neighborhood and trained Bailey to wear boots specifically for the heavily salted sections. We also implemented a consistent post-walk paw care routine. The most remarkable change came when we taught Bailey that the boots predicted good things—Michael would remove them after passing the "salt zones" and immediately engage Bailey in his favorite game. Within three weeks, Bailey went from dreading winter walks to eagerly waiting by the door when he saw his boots come out.
Indoor Alternatives for Winter Exercise
Mental Stimulation Games
A tired dog is a good dog, and mental exercise can be as exhausting as physical:
Treat Puzzles: Use puzzle toys that require problem-solving to access treats.
Scent Games: Hide treats around the house and encourage your dog to find them using their nose.
New Tricks Training: Winter is the perfect time to teach new behaviors that challenge your dog mentally.
Food-Dispensing Toys: Replace regular meals with food-dispensing toys that make eating an activity.
Rotation System: Keep a variety of interactive toys and rotate them every few days to maintain novelty.
Indoor Training Exercises
Maintain and improve your dog's training with these indoor-friendly activities:
Impulse Control Work: Practice "stay," "leave it," and "wait" in new contexts around the house.
Recall Games: Practice coming when called from different rooms, gradually adding distractions.
Target Training: Teach your dog to touch their nose to your hand or a target stick, then use this skill to create fun indoor courses.
Platform Work: Use a small mat or platform for "place" training, gradually increasing duration.
Handling Exercises: Practice examination handling (checking ears, teeth, paws) to build cooperation for health care.
Creative Ways to Burn Energy at Home
Physical exercise can still happen indoors with a little creativity:
Stair Workouts: If you have stairs, controlled up and down exercises can burn significant energy.
Hallway Fetch: A long hallway can become a fetch corridor with a soft toy.
Tug Sessions: Structured tug games with clear start and stop cues provide excellent exercise.
Indoor Obstacle Courses: Create simple obstacles using household items like cushions, boxes, and broomsticks.
Dancing With Your Dog: Turn on some music and guide your dog through a series of movements like spins, weaves between your legs, and backing up.
Conclusion
Winter doesn't have to mean paw pain or reduced activity for your dog. With the right preparation, training, and care routine, your four-legged family member can safely enjoy the winter months. The key is developing a comprehensive approach that includes:
Understanding and avoiding winter paw dangers
Implementing a complete paw protection system
Training your dog to accept protective boots
Using DIY paw balms when appropriate
Creating safe winter walking routines
Supplementing with indoor exercise options
Remember that consistency is crucial—make your winter paw care routine as much a habit as putting on your own gloves before heading out into the cold. Your dog's comfort and safety are worth the extra few minutes of preparation and aftercare.
Winter brings unique challenges, but with these strategies, you and your dog can continue enjoying your daily adventures together, no matter what the weather brings.
If your dog is struggling with winter walking or boot training, we can help! Our experienced trainers have worked with hundreds of dogs to overcome winter walking challenges and boot reluctance.
Call me at (248) 618-3258 or email [email protected] to discuss how we can help your dog learn to love winter walks again. Our proven Canine Connection Compass methodology has helped hundreds of dogs overcome boot anxiety and develop positive associations with winter walking gear.
You don't have to dread winter walks or worry about your dog's paw health—professional help is just a phone call away.
Happy training!
Mandy Majchrzak
Owner and Head Trainer
Clever Canine Dog Training
Metro Detroit's Family Dog Training Specialists